This
is the key session that your smooching (per my prior warning) pays off![]() ...
...
Cutting the Spar Cap Glass Tapes
Instead of building a dispensing fixture for the tape, I just mounted the roll of glass tape on my adjustable work table (left). Stick a paper tube through the center of the roll. Add a couple of c-clamps to confine the paper tube movement and it worked just fine. I used masking tape to tape down the glass ends - centered at the cut point (before trimming) so that they don't fray.
[Hindsight] It turned out to be a pain to remove the masking tape later. I would recommend to tape it AFTER the cut point, so that you can just cut the taped ends off entirely before use. A little wasteful, but well worth it. As for the longest tape, cut it to at least 138" (or measure it out first) instead of 135"+ per plan because I ended up a bit short and had to do a little bit of 'patch up' later on. |
|
After both spar caps were done, I removed the fence and rounded off the edges with a 3/16" router. I also spent a fair amount of time to remove the excess flox that leaked past my fence onto CS1 surface. |
|
-
When I stacked up the pre-cut glass tape, they looked thick. It seemed there was no
way I could fit them within the thickness of the trough. So...I was pretty
aggressive in removing excess epoxy throughout the lay-up process. When it was
completed and cured, it turned out my trough level was about .06" too low - The spar tape soaked up LOTS of epoxy. Therefore, make sure you have plenty of epoxy on hand before you start. -
A hair dryer is much needed if you do not want to spend 20 hours on this step - Make sure your fence is tight against CS1 to contain the spar cap tape. I ended up having to sand them flush with CS1 surface. I may not have to do so, but I did it anyway. |
 This
section requires 23 layers and 17 layers of glass on the top and bottom spar cap
trough respectively. Various
Cozy builders used a variety of methods to keep track of the number of plies
being added throughout the lay-up process. Rumor had it - some builders even ran out of the
3" glass tape mid-stream. To avoid both of the problems, I decided to
pre-cut the glass tape to length ahead of time and line them up along side the
center section spar. So...when I used up all the glass, I am done!
This
section requires 23 layers and 17 layers of glass on the top and bottom spar cap
trough respectively. Various
Cozy builders used a variety of methods to keep track of the number of plies
being added throughout the lay-up process. Rumor had it - some builders even ran out of the
3" glass tape mid-stream. To avoid both of the problems, I decided to
pre-cut the glass tape to length ahead of time and line them up along side the
center section spar. So...when I used up all the glass, I am done!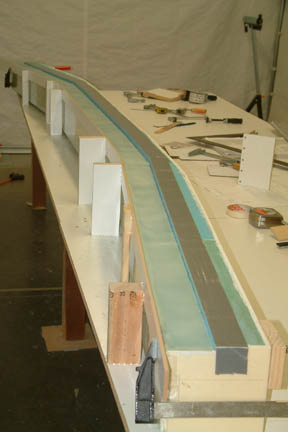 I
also built the fence to keep the glass tape in place per plan. I used hot glue
to hold the fence and its support beams in place. Then I added some dry flox
along the rounded corner (of the foam) at the base of the fence to keep epoxy
from seeping down the fence (from Wayne Hick's site). Recognizing
it will be a time consuming step, I started about 10 am - Susann joined
forces after an hour or so. Mother nature was flexing her temperament a bit that
day and our room temperature plummeted to about 52oF. My little space
heater could barely keep our enclosure tent above 60oF. With the hair dryer
at max heat, it took us 12 hours to complete the top lay-up plus peel plied. I
had to build a
small heat tent to make sure the glass cured properly through the night. I
repeated the same on the bottom spar cap the next day.
I
also built the fence to keep the glass tape in place per plan. I used hot glue
to hold the fence and its support beams in place. Then I added some dry flox
along the rounded corner (of the foam) at the base of the fence to keep epoxy
from seeping down the fence (from Wayne Hick's site). Recognizing
it will be a time consuming step, I started about 10 am - Susann joined
forces after an hour or so. Mother nature was flexing her temperament a bit that
day and our room temperature plummeted to about 52oF. My little space
heater could barely keep our enclosure tent above 60oF. With the hair dryer
at max heat, it took us 12 hours to complete the top lay-up plus peel plied. I
had to build a
small heat tent to make sure the glass cured properly through the night. I
repeated the same on the bottom spar cap the next day.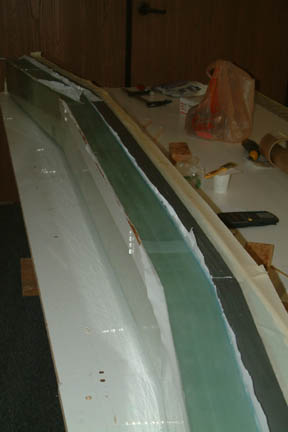 A
couple points need mentioning here:
A
couple points need mentioning here: