Chapter
17 - Section 3
Landing
Brake and Center Console
Landing
Brake
I
installed Wayne
Lanza's electric landing brake in Chapter 9 - Section 6  ...
You can view it via my side panel.
...
You can view it via my side panel.
Fuel
Selector
The
plans fuel selector is located at the front seat back between the pilot and
co-pilot. Many builders chose to move them to the center console or back by the
fire wall and control the switching via a torque tube or cable. I like the
center console idea better and decided to tackle it at this time.
Andair
makes many models of fuel selectors and the favorite one (among the Cozy
builders) is their model FS20-2 & -3 which is their 90o &
180o Left/Right/Off valves respectively. Its incoming ports (left and
right tank) are perpendicular to the center line of the fuselage, thus
requiring extra width at the center console. Wayne Hick's web site demonstrated
how that can be done nicely. When I was shopping for my Andair fuel selector, I was
alerted by several sources that Andair came out with a new model where the input
ports come in at an angle - like the letter 'Y'. That would reduce some width
requirement at the console. I went through Andair's site and found the model to
be FS20-7. Its about $229 plus shipping (before adding any connector hardware,
07/2007) -
ouch! I could not find any shop in the U.S. that had this new model in stock.
Aircraft Spruce has the FS20-2 for $318 (06/2007).
|
 While
I was searching the web for better luck, I came across an RV builder who
installed one of them. That lead me to the RV site and I found their equivalent
model - FS20-7T, and its $205 + $4 shipping. Instead of horizontal input ports, it already has
an 90o elbow - pointing downwards. I think its perfect for our
installation. (Recall the pain trying to tighten an elbow and have its
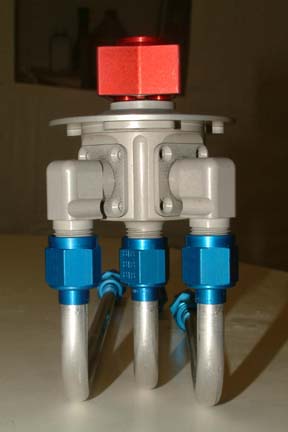
final position pointing to a certain direction at the same time?) I placed an order through Vans Aircraft web sales and it arrived in
5 business days (from Oregon). BTW, I was not able to find FS20-7T in Andair's
web site. Here's a picture of the FS20-7T fuel valve with tubing I installed. Note the difference between FS20-7 and this one? While
I was searching the web for better luck, I came across an RV builder who
installed one of them. That lead me to the RV site and I found their equivalent
model - FS20-7T, and its $205 + $4 shipping. Instead of horizontal input ports, it already has
an 90o elbow - pointing downwards. I think its perfect for our
installation. (Recall the pain trying to tighten an elbow and have its
final position pointing to a certain direction at the same time?) I placed an order through Vans Aircraft web sales and it arrived in
5 business days (from Oregon). BTW, I was not able to find FS20-7T in Andair's
web site. Here's a picture of the FS20-7T fuel valve with tubing I installed. Note the difference between FS20-7 and this one?
|
|
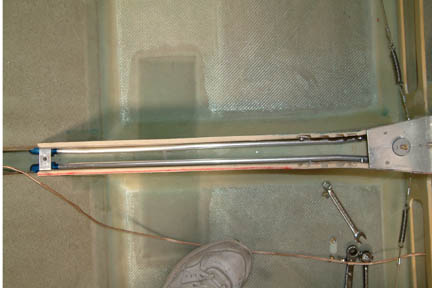
 Here's
my initial thought in mounting the fuel valve onto our center console. I have to
stagger the disconnects (as required per plan) to minimize the total width
requirement. I like to keep the center console the same width as the heat duct -
IF possible. The only thing I didn't like is that my fuel lines and disconnects
run right over the safety belt anchor. If that ever come off in an accident, the
fuel lines can rupture and I am going to have fuel in the cockpit... not a
comforting thought. But then, if this safety belt anchor ever comes off, one probably
would not have survived... but then again, getting roasted... Hmmm... I am going to
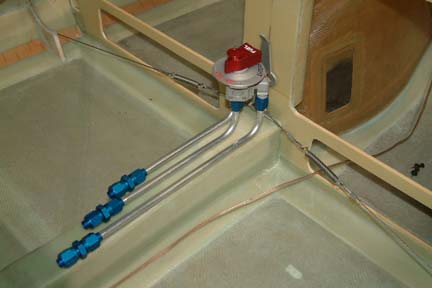
give it some more thought Here's
my initial thought in mounting the fuel valve onto our center console. I have to
stagger the disconnects (as required per plan) to minimize the total width
requirement. I like to keep the center console the same width as the heat duct -
IF possible. The only thing I didn't like is that my fuel lines and disconnects
run right over the safety belt anchor. If that ever come off in an accident, the
fuel lines can rupture and I am going to have fuel in the cockpit... not a
comforting thought. But then, if this safety belt anchor ever comes off, one probably
would not have survived... but then again, getting roasted... Hmmm... I am going to
give it some more thought  . .
|
Center
Console Sides
Since
I am deviating from plan (though I promised myself never do it again since my
rudder pedals) by moving the fuel selector from the front seat
back to the front of the center console, I need to change its shape and size to
accommodate the rather wide body of the Andair fuel selector. I would also like to minimize the height of
the center console to provide maximum spacing between the front seats. Though it
sounded simple, I ended up spending a good amount of time in foam shaping,
special aluminum brackets and hardware mounting to make it work. Here's what I
did:
|
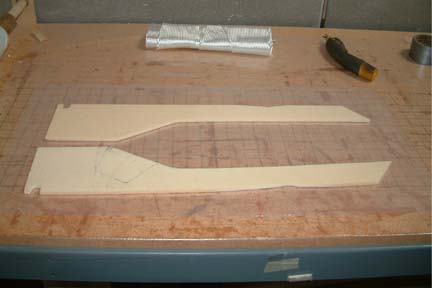 I
first cut up the foam for the sides to my own dimensions to accommodate the
throttle quadrant and fuel selector. Note the small notch at the bottom to
accommodate the manual roll trim I installed in Section 1. The throttle quadrant
will be mounted at the slop sides. I plan to tilt the TQ at 30o angle
such that when it is fully engaged (max), the throttle handle will be at
vertical position - thus no interference to the fuel selector. If you look
close, you can see the outline of the throttle quadrant drawn on the console
sides. (refer to Section
4 of this chapter for more details). I
first cut up the foam for the sides to my own dimensions to accommodate the
throttle quadrant and fuel selector. Note the small notch at the bottom to
accommodate the manual roll trim I installed in Section 1. The throttle quadrant
will be mounted at the slop sides. I plan to tilt the TQ at 30o angle
such that when it is fully engaged (max), the throttle handle will be at
vertical position - thus no interference to the fuel selector. If you look
close, you can see the outline of the throttle quadrant drawn on the console
sides. (refer to Section
4 of this chapter for more details).
|
Glassing
the Sides
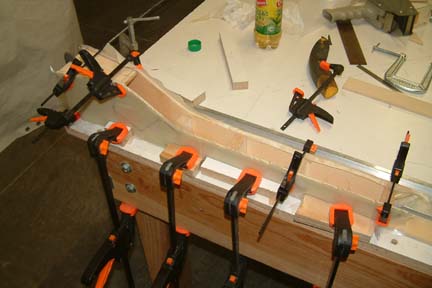 I
applied 2 layers of BID on the outside faces of the console sides flat on the
work bench. However, I clamped them in place to cure such that it will take the
curved shape. I clamped the console sides at vertical position with the help of a couple foam
templates. The first template is at the bottom that mimics the heat duct. The other is at
the top, which I used the full width of the Instrument Panel center post. The reason for this 2nd template is to ensure maximum width spacing to
accommodate the fuel valve. I also used several 1 1/2" width wood blocks to keep the
rest of the console sides in place. Don't forget to wrap the blocks with packing
tape and add a small piece of plastic between the clamps and glass. Once cured, I trimmed off the rough edges and proceed to
make a top cover. I
applied 2 layers of BID on the outside faces of the console sides flat on the
work bench. However, I clamped them in place to cure such that it will take the
curved shape. I clamped the console sides at vertical position with the help of a couple foam
templates. The first template is at the bottom that mimics the heat duct. The other is at
the top, which I used the full width of the Instrument Panel center post. The reason for this 2nd template is to ensure maximum width spacing to
accommodate the fuel valve. I also used several 1 1/2" width wood blocks to keep the
rest of the console sides in place. Don't forget to wrap the blocks with packing
tape and add a small piece of plastic between the clamps and glass. Once cured, I trimmed off the rough edges and proceed to
make a top cover.
|
Center
Console Cover
 The
plan suggested that the fuel selector (I assume the throttle quadrant as well)
should be accessible for maintenance. That means (at least to me), I need a
cover for the center console. The
plan suggested that the fuel selector (I assume the throttle quadrant as well)
should be accessible for maintenance. That means (at least to me), I need a
cover for the center console.
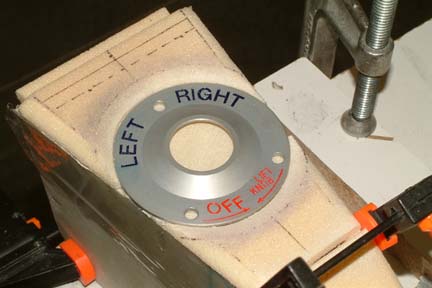
I
started to make a top cover out of a 1/8" thick aluminum sheet but
changed my mine to foam instead. It is because I can make a nice curvature at
the base of the throttle quadrant. The top part of the console cover was also shaped to
accommodate the fuel selector marking plate (as shown). Note the width of the
console is barely wide enough to accommodate the fuel selector plate. I carved out
the circular indentation with my Dremel (reference tricks page) and rounded off
its edges.
|
|
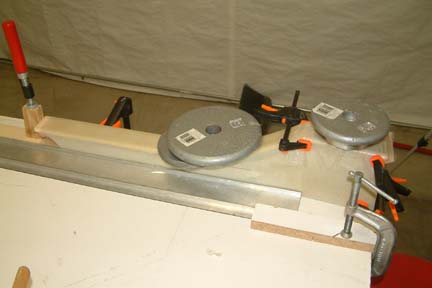
 The
rest of the cover was just a long 2" strip. I used a 1/4" radius
router to round off its edges before glassing. I had to
use about 10 lbs. of weight to keep that foam curvature in place. The
rest of the cover was just a long 2" strip. I used a 1/4" radius
router to round off its edges before glassing. I had to
use about 10 lbs. of weight to keep that foam curvature in place.
|
|
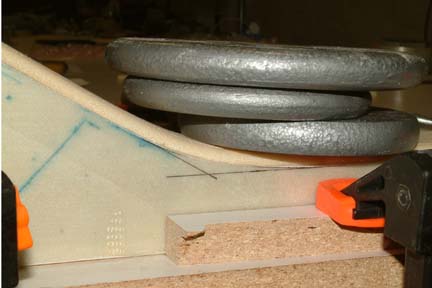
 Then I glassed the entire cover
with 2 layers of BID, covering it up with saran wrap and weigh it down to cure.
For the fuel selector, I place the selector plate over the indentation and
weighed it down with 2 lbs disc. The cover turned out nice, but I am far from
done yet. Once cured, I separated the top cover and the sides. Then I glassed the entire cover
with 2 layers of BID, covering it up with saran wrap and weigh it down to cure.
For the fuel selector, I place the selector plate over the indentation and
weighed it down with 2 lbs disc. The cover turned out nice, but I am far from
done yet. Once cured, I separated the top cover and the sides.
|
Mounting the Fuel Selector
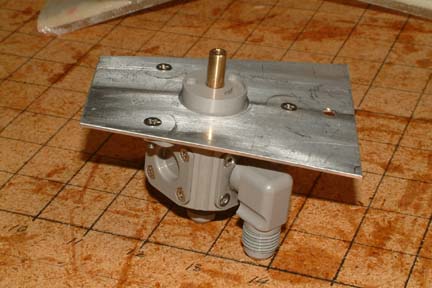 I
cut up a 1/8" thick aluminum plate (as shown) for mounting the fuel
selector. I used the paper template that came with the fuel selector and traced
out the hole locations - 3 small holes and a large center hole. Then I carved a
small step on top of the console sides such that I can embed the
mounting plate in position. My
next step includes carving and smoothing out some more foam (down the sides) to accommodate the
width of the fuel selector (even with the Y shaped elbows). I
cut up a 1/8" thick aluminum plate (as shown) for mounting the fuel
selector. I used the paper template that came with the fuel selector and traced
out the hole locations - 3 small holes and a large center hole. Then I carved a
small step on top of the console sides such that I can embed the
mounting plate in position. My
next step includes carving and smoothing out some more foam (down the sides) to accommodate the
width of the fuel selector (even with the Y shaped elbows).
I
also made a lot of planning, carving, and mounting for the throttle quadrant
(refer to Section 4) before floxing the sides onto the top of the heat
duct.
|
Routing
the Fuel Lines
 After
conferring the fuel line routing with a couple Cozy builders, I decided to
extend the connection to the back of the front seat back. I used a couple of the
90o elbows to make the turn from the heat duct towards the side of
the fuselage. Basically, my fuel line routing is pretty much same as plan,
except it is extended further to the front of the fuel selector with an elbow. After
conferring the fuel line routing with a couple Cozy builders, I decided to
extend the connection to the back of the front seat back. I used a couple of the
90o elbows to make the turn from the heat duct towards the side of
the fuselage. Basically, my fuel line routing is pretty much same as plan,
except it is extended further to the front of the fuel selector with an elbow.
|
|
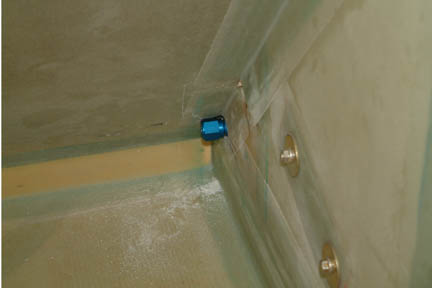 Here's
a picture showing the elbow coming out to the back of the front seat back. Here's
a picture showing the elbow coming out to the back of the front seat back.
|
Flox
in the Console Sides
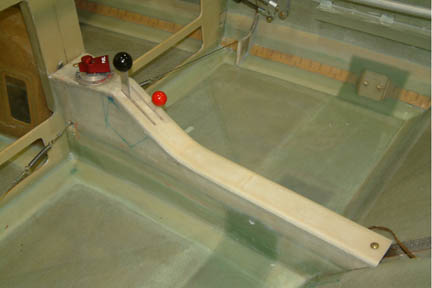
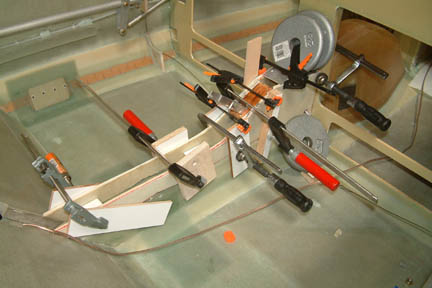 I
took 2 sequential steps in floxing the console sides onto the top of the heat duct. The
first step includes putting a few dabs of flox at bottom edge of the console
sides and clamping it down in place to cure. The clamping was to keep the
console sides flush with the heat duct sides. I also slipped a couple of blocks
(wrapped with packing tape) inside the slot to keep the console sides from collapsing
to the middle. I
took 2 sequential steps in floxing the console sides onto the top of the heat duct. The
first step includes putting a few dabs of flox at bottom edge of the console
sides and clamping it down in place to cure. The clamping was to keep the
console sides flush with the heat duct sides. I also slipped a couple of blocks
(wrapped with packing tape) inside the slot to keep the console sides from collapsing
to the middle.
|
|
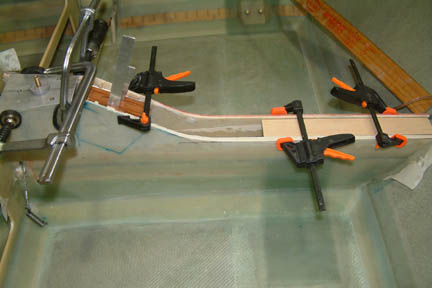 Once
cured, the console sides will stay in shape and in place without clamping -
allowing me to flox and glass the interface / seam at the sides (both inside and
outside) without
obstruction. The clamps used here are for keeping the width at the top in check.
Note the outline of the throttle quadrant drawn on the side? Once
cured, the console sides will stay in shape and in place without clamping -
allowing me to flox and glass the interface / seam at the sides (both inside and
outside) without
obstruction. The clamps used here are for keeping the width at the top in check.
Note the outline of the throttle quadrant drawn on the side?
|
Holding
the Center Console Cover in Place
I
had a tough time deciding how to hold the Center Console cover in place - hold
it down from the top... from the sides...from the top... .
Holding it from the top allows me to pull the cover down against its sides -
thus no gaps. On the other hand, the hold down screws will be showing on the top
of the cover. The side mounting approach will have screws on the sides and not
on the top, less noticeable but may not hold down the cover as well.
Fortunately, my cover has such a tight fit to the console, only minimum
anchoring is needed - a couple of bolts (at both ends) might just do the
job.
.
Holding it from the top allows me to pull the cover down against its sides -
thus no gaps. On the other hand, the hold down screws will be showing on the top
of the cover. The side mounting approach will have screws on the sides and not
on the top, less noticeable but may not hold down the cover as well.
Fortunately, my cover has such a tight fit to the console, only minimum
anchoring is needed - a couple of bolts (at both ends) might just do the
job.
|
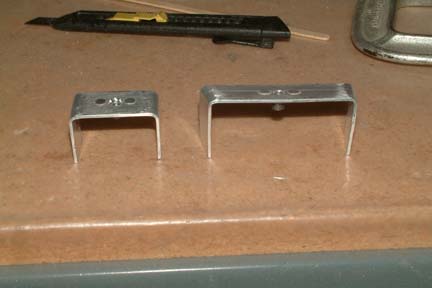 I
decided to mount the cover from the top (no seams) because I found a couple
spots for the hold down screws that are not very noticeable. I made 2 small aluminum brackets with a nut plate at the
center (as shown). I floxed and
glassed them at both ends of the center console - the large one at the front and
the small one at the back. For the large one, I have a bolt going through the
cover, the fuel selector plate, then tightened through the nut plate. The small
one just holds the cover in place. I
decided to mount the cover from the top (no seams) because I found a couple
spots for the hold down screws that are not very noticeable. I made 2 small aluminum brackets with a nut plate at the
center (as shown). I floxed and
glassed them at both ends of the center console - the large one at the front and
the small one at the back. For the large one, I have a bolt going through the
cover, the fuel selector plate, then tightened through the nut plate. The small
one just holds the cover in place.
|
|
 Once
I fitted the fuel selector and the throttle quadrant, I lay the cover over the
sides and held it down with the two bolts discussed above. Notice the bolts with
one at the front between the fuel
selector and roll trim and the other at the rear next to the seat back? With
this setup, I now have full access to the fuel selector, the throttle quadrant,
the
roll trim, quadrant cables and fuel lines as needed. Once
I fitted the fuel selector and the throttle quadrant, I lay the cover over the
sides and held it down with the two bolts discussed above. Notice the bolts with
one at the front between the fuel
selector and roll trim and the other at the rear next to the seat back? With
this setup, I now have full access to the fuel selector, the throttle quadrant,
the
roll trim, quadrant cables and fuel lines as needed.
|