 I
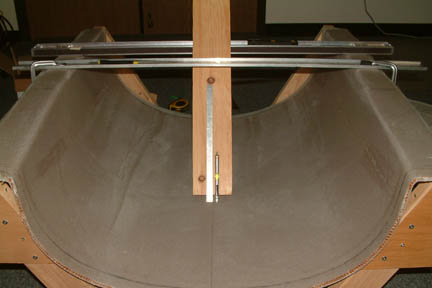
took a straight edge and clamped it against the 27 1/4" mark as a stop (as
shown). Note the mark is against the face of the slanting board and not the
supporting board (Fig. 14 on the plan). Since the slanting board has a certain thickness,
its top face would not be able to touch the 17" mark on the TB. I used a thin
ruler and extended its top surface, to make sure it reaches the target. Then I
clamped another straight edge to butt against the back of the slanting board,
sandwiching it in place.
I
took a straight edge and clamped it against the 27 1/4" mark as a stop (as
shown). Note the mark is against the face of the slanting board and not the
supporting board (Fig. 14 on the plan). Since the slanting board has a certain thickness,
its top face would not be able to touch the 17" mark on the TB. I used a thin
ruler and extended its top surface, to make sure it reaches the target. Then I
clamped another straight edge to butt against the back of the slanting board,
sandwiching it in place.
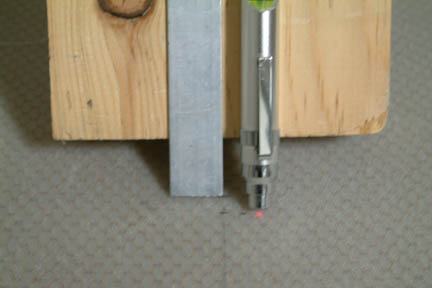 Resting
a laser pointer on the the slanting board, I cast a
laser dot on the surface of the TB. This is because there is a certain thickness
between the base of the laser and the center of the beam. By measuring the
distance between the laser dot and the original 17" mark, the offset can be
determined. Mine turned out to be exactly 1/4". With that information, I
took all the clamps off and moved the entire set up back by 1/4".
Resting
a laser pointer on the the slanting board, I cast a
laser dot on the surface of the TB. This is because there is a certain thickness
between the base of the laser and the center of the beam. By measuring the
distance between the laser dot and the original 17" mark, the offset can be
determined. Mine turned out to be exactly 1/4". With that information, I
took all the clamps off and moved the entire set up back by 1/4".
 After
I joined the dots with a flexible straight edge, I drilled a series of holes
(~1" apart) along the future cut line. Then I duct taped the forward side
of the cut line and 5 minute epoxied the 1 1/4" beveled foam strip per plan.
Note that I cut each strip to about 10" in length such that I can hold it
in place (conform to the curvature of the cut line) while the 5 minute epoxy
cures. Next I glassed the drip rail in place.
After
I joined the dots with a flexible straight edge, I drilled a series of holes
(~1" apart) along the future cut line. Then I duct taped the forward side
of the cut line and 5 minute epoxied the 1 1/4" beveled foam strip per plan.
Note that I cut each strip to about 10" in length such that I can hold it
in place (conform to the curvature of the cut line) while the 5 minute epoxy
cures. Next I glassed the drip rail in place.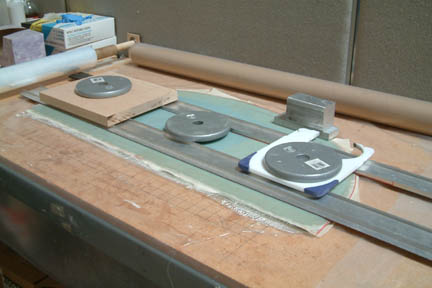 I
traced out the TB-1 pattern on 3/8" thick low density PVC foam per plan. I
was a bit short of the foam, so I made two halves and joined them with 5 minute epoxy before glassing. I also added about an inch of height to the
bottom because I raised the TB by an inch. I extended the triangle patterns down
to the new depth. Picture shows TB-1 being glassed and weighed down to
cure.
I
traced out the TB-1 pattern on 3/8" thick low density PVC foam per plan. I
was a bit short of the foam, so I made two halves and joined them with 5 minute epoxy before glassing. I also added about an inch of height to the
bottom because I raised the TB by an inch. I extended the triangle patterns down
to the new depth. Picture shows TB-1 being glassed and weighed down to
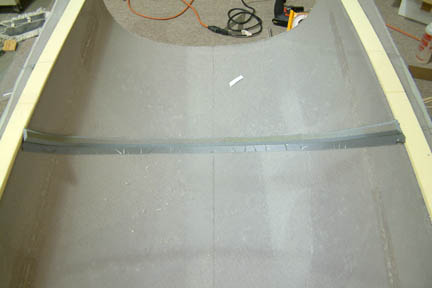
cure. 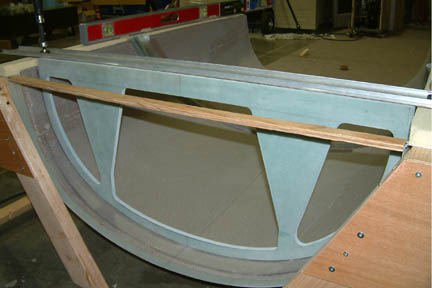 Once
cured, the edges were trimmed and cut outs were removed. Picture shows trial
fitting TB-1 to the turtle back. The horizontal stick in the front was to keep
the TB at the correct width according to plan.
Once
cured, the edges were trimmed and cut outs were removed. Picture shows trial
fitting TB-1 to the turtle back. The horizontal stick in the front was to keep
the TB at the correct width according to plan.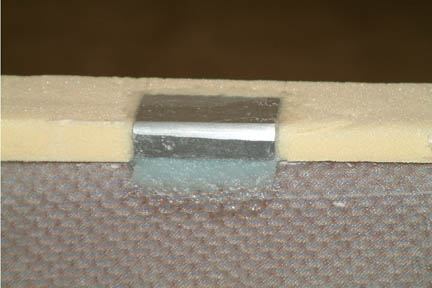 While
I was at it, I made the aluminum insert out of a 2" x 1 1/4" x
1/2" block and glassed it at designated location per plan. I made sure the edge is rounded off for future glassing. The only difference is
that my insert is .5" thick such that it fits flush with my raised turtle back.
While
I was at it, I made the aluminum insert out of a 2" x 1 1/4" x
1/2" block and glassed it at designated location per plan. I made sure the edge is rounded off for future glassing. The only difference is
that my insert is .5" thick such that it fits flush with my raised turtle back.