 I
cut up a 4" section of the same hinge I used for the sides, then separated
the 2 halves. I marked a center line at the forward face of the forward deck and
notched out a small slot (both glass & foam) such that I can butt the hinge
into the foam while flush with the forward face.
I
cut up a 4" section of the same hinge I used for the sides, then separated
the 2 halves. I marked a center line at the forward face of the forward deck and
notched out a small slot (both glass & foam) such that I can butt the hinge
into the foam while flush with the forward face.
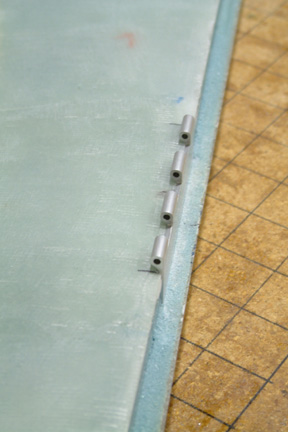
I have to trim the hinge half a bit narrower such that the hinge eyelets protrude just above the bottom edge of the forward deck. I also drilled 4 1/8" diameter holes through the hinge face to provide added anchoring (of the hinge) when I add flox to both sides of the hinge.

 Once
cured, I carefully put in 3 more blind rivets to secure the hinge half. I was
very careful not to drill through F28 when mounting the rivets. I have to order
the shortest blind rivets (1/4" long & 1/8" diameter) from
McMaster-Carr. Next, I cut up a short hinge pin with a 90o elbow and
slid it right in. Access to the hinge pin was not a problem because it is right
at the bottom edge of the forward deck.
Once
cured, I carefully put in 3 more blind rivets to secure the hinge half. I was
very careful not to drill through F28 when mounting the rivets. I have to order
the shortest blind rivets (1/4" long & 1/8" diameter) from
McMaster-Carr. Next, I cut up a short hinge pin with a 90o elbow and
slid it right in. Access to the hinge pin was not a problem because it is right
at the bottom edge of the forward deck.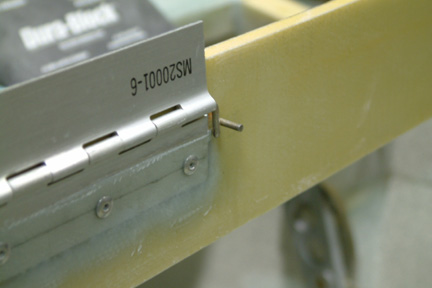 To
keep the hinge pin in place such that it will not slide out unexpectedly, I
installed a short pin in its path (left). The pin is long enough that I have
to 'swing' the hinge pin elbow up ~45o before I can pull it out. Just
a simple safety measure added.
To
keep the hinge pin in place such that it will not slide out unexpectedly, I
installed a short pin in its path (left). The pin is long enough that I have
to 'swing' the hinge pin elbow up ~45o before I can pull it out. Just
a simple safety measure added.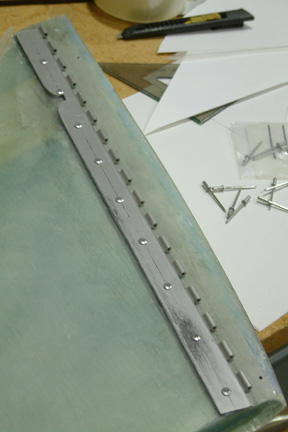 I
floxed the side hinges to the bottom of the forward deck earlier in Section 15. I
did not add the rivets until now because the blind rivets called out in the
plans were a bit too long and I did not have any shorter ones. I used the same
rivets as above. They worked out
OK.
I
floxed the side hinges to the bottom of the forward deck earlier in Section 15. I
did not add the rivets until now because the blind rivets called out in the
plans were a bit too long and I did not have any shorter ones. I used the same
rivets as above. They worked out
OK.