Glassing
the Ribs and Bulkheads
 The
next task was to make the ribs and bulkheads for the strakes. I followed the
general consensus in joining two 48" x 32" H45 PVC foam, then applied 1
BID layer on both sides. This part was pretty straight forward except it is a
large piece of foam to micro and glass. I did one side one evening and the other
side the next. After cure, I traced/drew out all the rib and bulkhead
patterns per M25 and plans. I noticed some surface imperfections from the peel-ply, I decided to paint another layer of pure epoxy and peel-plied one more
time.
The
next task was to make the ribs and bulkheads for the strakes. I followed the
general consensus in joining two 48" x 32" H45 PVC foam, then applied 1
BID layer on both sides. This part was pretty straight forward except it is a
large piece of foam to micro and glass. I did one side one evening and the other
side the next. After cure, I traced/drew out all the rib and bulkhead
patterns per M25 and plans. I noticed some surface imperfections from the peel-ply, I decided to paint another layer of pure epoxy and peel-plied one more
time.
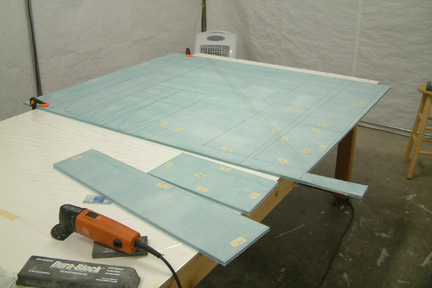
Since
I was planning to use the Feather Lite leading edge, I did not cut out the BLE,
TLE and OD bulkheads - not yet anyway. However, I made sure I have enough
glassed foam for them if I need them. I connected the R33 to the B33 as a continuous
piece and its 46.8", just an inch shy of 48".
Instead
of using the band saw, I just used the FEIN tool and cut out all the ribs and
bulkheads with little problem. Then I sanded the edges down to its outline with a
sanding block.
 In
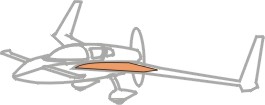
this chapter, we will be building the strakes - the structure that holds the
fuel tanks between the fuselage and the main wings. The leading edge of the
strakes must be straight and should blend with the main wings naturally. This is
one of the most noticeable locations if you do a lousy job.
In
this chapter, we will be building the strakes - the structure that holds the
fuel tanks between the fuselage and the main wings. The leading edge of the
strakes must be straight and should blend with the main wings naturally. This is
one of the most noticeable locations if you do a lousy job. 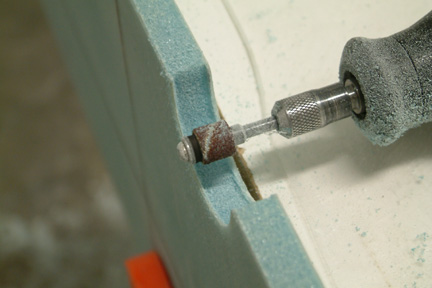 Since
the foam is sandwiched between the glass (1 ply on each side), I need to be
careful not to damage the side edges. I took a 1/4" x 1/2" Dremel
grinding wheel and ground it down to 3/8" in length (same thickness as the
H45 foam). With a Dremel and this shortened grind wheel, I removed a slight
trench inside the half moon notches. It worked perfectly...
Since
the foam is sandwiched between the glass (1 ply on each side), I need to be
careful not to damage the side edges. I took a 1/4" x 1/2" Dremel
grinding wheel and ground it down to 3/8" in length (same thickness as the
H45 foam). With a Dremel and this shortened grind wheel, I removed a slight
trench inside the half moon notches. It worked perfectly...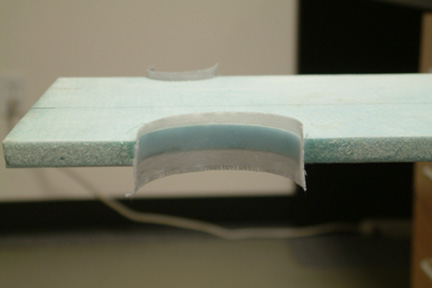 I
made some wet flox and 'whipped' it well before use. The reason for whipping the
flox is to remove the cotton fiber lumps such that they will lay down smoothly.
Once I filled the trenches with flox, I further smoothed it out with pure epoxy
and peel-plied.
I
made some wet flox and 'whipped' it well before use. The reason for whipping the
flox is to remove the cotton fiber lumps such that they will lay down smoothly.
Once I filled the trenches with flox, I further smoothed it out with pure epoxy
and peel-plied.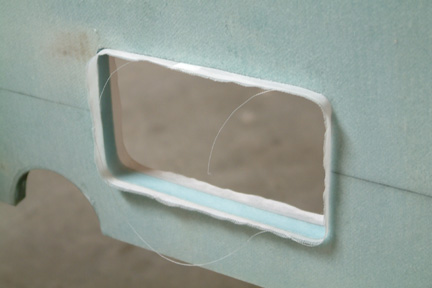 I
did the same for the sight window on B33 as well though I did not cut these
sight windows until later on.
I
did the same for the sight window on B33 as well though I did not cut these
sight windows until later on.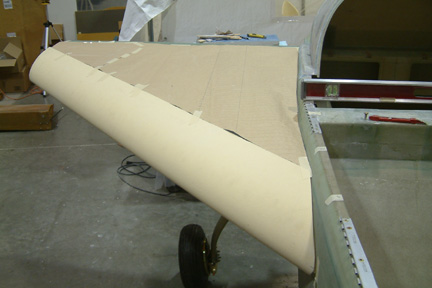 Since
I am using a pre-fabricated leading edge, the top skin dimension in the plan
would not work for me. So, I taped up a few large wrapping papers and traced it
out (left). I also decided to make the top skin in a single piece of foam
instead of two separate pieces per plan.
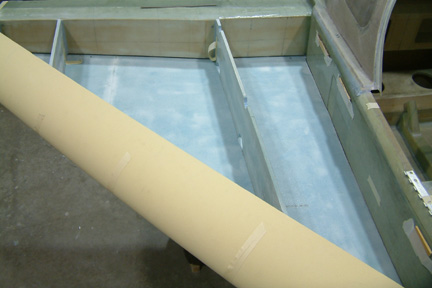
Since
I am using a pre-fabricated leading edge, the top skin dimension in the plan
would not work for me. So, I taped up a few large wrapping papers and traced it
out (left). I also decided to make the top skin in a single piece of foam
instead of two separate pieces per plan. 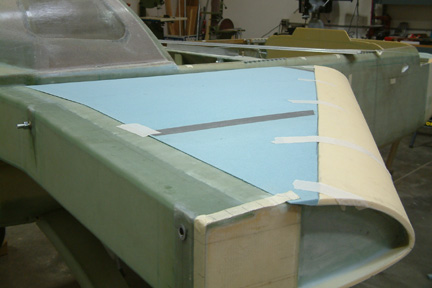 I
was able to make the entire top skin with a single piece of 48"x32"
foam though I have to do a little bit of joining (3 pieces of foam all together) - the main piece next
to the fuselage, the triangle piece at the wing tip and a small triangular piece
(gray in color) at the forward tip of the top skin. Actually I messed up when
cutting the top skin (the first time), I ended up a bit short with that small triangular piece. I
did a much better job on the bottom skin though. since the Feather Lite leading
edge took most of the LE curvature, I still have to lance 4 lines along the foam
to make a smooth transition between the LE and the top and bottom skin.
I
was able to make the entire top skin with a single piece of 48"x32"
foam though I have to do a little bit of joining (3 pieces of foam all together) - the main piece next
to the fuselage, the triangle piece at the wing tip and a small triangular piece
(gray in color) at the forward tip of the top skin. Actually I messed up when
cutting the top skin (the first time), I ended up a bit short with that small triangular piece. I
did a much better job on the bottom skin though. since the Feather Lite leading
edge took most of the LE curvature, I still have to lance 4 lines along the foam
to make a smooth transition between the LE and the top and bottom skin. 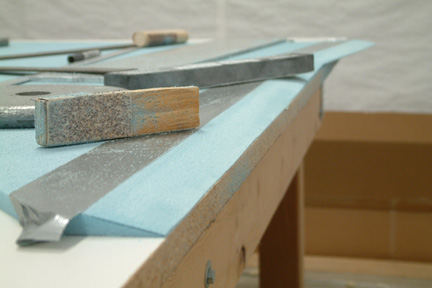 I
beveled the trailing edges of both the top and bottom skin to fit onto the center
section spar per plan. Note the duct tape along the trailing edge? The duct tape
kept my sanding straight and kept me from over sanding. Once I was happy with the trial fit, I glassed the inside
surface with 1 ply of BID and peel-plied.
I
beveled the trailing edges of both the top and bottom skin to fit onto the center
section spar per plan. Note the duct tape along the trailing edge? The duct tape
kept my sanding straight and kept me from over sanding. Once I was happy with the trial fit, I glassed the inside
surface with 1 ply of BID and peel-plied.