Bottom Skin Profile at Fuselage
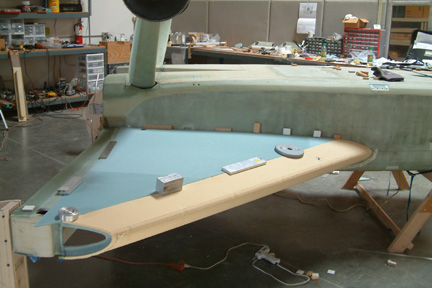 As mentioned in prior sections, I measured
out both the top and bottom skin profile (right) at the fuselage and transferred
the same to the left strake. I used WL17.4 as the datum line. Once they were
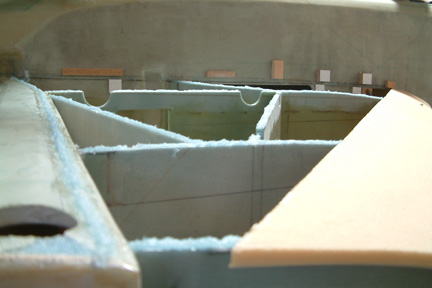
traced out, I hot glued a series of small wood blocks along the profile to
support the bottom skin. The more important blocks are hidden under the bottom
skin.
As mentioned in prior sections, I measured
out both the top and bottom skin profile (right) at the fuselage and transferred
the same to the left strake. I used WL17.4 as the datum line. Once they were
traced out, I hot glued a series of small wood blocks along the profile to
support the bottom skin. The more important blocks are hidden under the bottom
skin.
Once completed, I re-fit the skins in place and weighed them down. Then I lay down underneath the strakes to inspect and take a mental note on the contact surfaces and potential gaps.
 I removed the bottom skin and applied a thick bead of
flox along the top edges of the ribs and bulkheads. Then I carefully lay the
bottom skin back on and applied all the necessary weight to keep a nice bottom
skin profile.
I removed the bottom skin and applied a thick bead of
flox along the top edges of the ribs and bulkheads. Then I carefully lay the
bottom skin back on and applied all the necessary weight to keep a nice bottom
skin profile.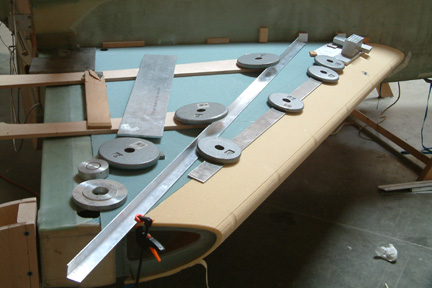 Here's
a picture of the bottom skin weighed down...Looks messy, but all the seams line
up nicely.
Here's
a picture of the bottom skin weighed down...Looks messy, but all the seams line
up nicely.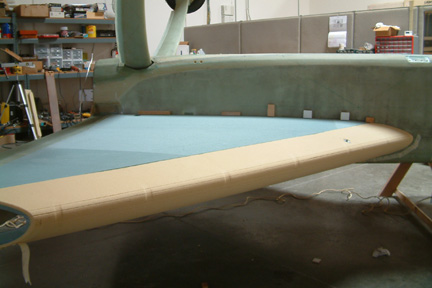 Here's
a picture of my port side bottom skin after its floxed in and...
Here's
a picture of my port side bottom skin after its floxed in and...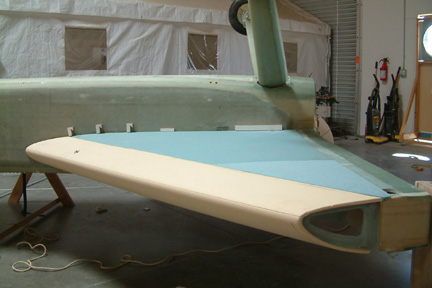 starboard
side. They look pretty symmetrical.
starboard
side. They look pretty symmetrical.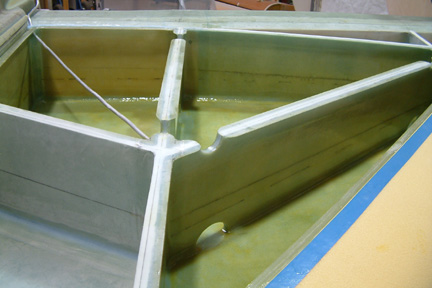 There
has been a lot of discussion on the resistance of our epoxy to various types of
gas available for our airplanes. I used MGS 285 and at this time, I was not able
to find any specific confirmation that MGS 285 is OK to line our fuel
tanks. Many projections and assumptions - nothing specific such as a published
laboratory test result. Right about this time, John Slade published his problem
with auto fuel in his tanks (he used MGS 285). Though I am not planning to use
an auto conversion engine, I decided to line my fuel tanks with E-Z Poxy (per Gary
Hunter's recommendations) for peace of mind.
There
has been a lot of discussion on the resistance of our epoxy to various types of
gas available for our airplanes. I used MGS 285 and at this time, I was not able
to find any specific confirmation that MGS 285 is OK to line our fuel
tanks. Many projections and assumptions - nothing specific such as a published
laboratory test result. Right about this time, John Slade published his problem
with auto fuel in his tanks (he used MGS 285). Though I am not planning to use
an auto conversion engine, I decided to line my fuel tanks with E-Z Poxy (per Gary
Hunter's recommendations) for peace of mind.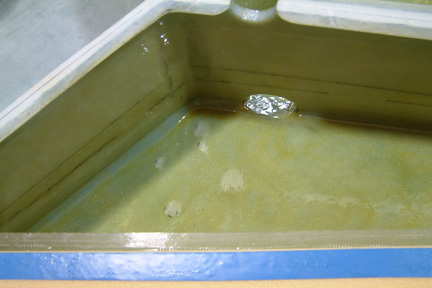 I
returned the next day and, to my surprise, I found numerous pin holes on the
newly epoxied surface
I
returned the next day and, to my surprise, I found numerous pin holes on the
newly epoxied surface