Armrest
 I
made a paper template for the top of the armrest to help me cut and shape the
foam. I had to carve out some foam inside the armrest to clear the control rod
movements. They include CS109 bracket, roll trim bracket and the
bolt head at the end of the control rod. The paper template helps to reduce a
lot of trimming with the foam pieces.
I
made a paper template for the top of the armrest to help me cut and shape the
foam. I had to carve out some foam inside the armrest to clear the control rod
movements. They include CS109 bracket, roll trim bracket and the
bolt head at the end of the control rod. The paper template helps to reduce a
lot of trimming with the foam pieces.
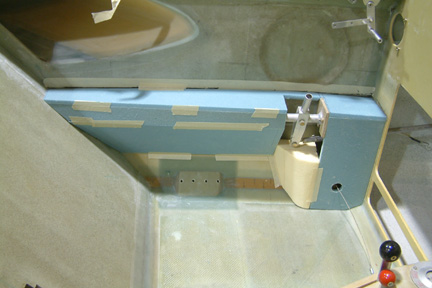
The picture shows the armrest - many odd shaped pieces being taped together. I shaped a piece of urethane foam for the transition piece (yellow). I spent a lot of time on it but was not happy with the result. In addition, I do not think I can shape the left and the right to look the same. I decided to take a different approach.
 Here's
what I did to replace the urethane foam.
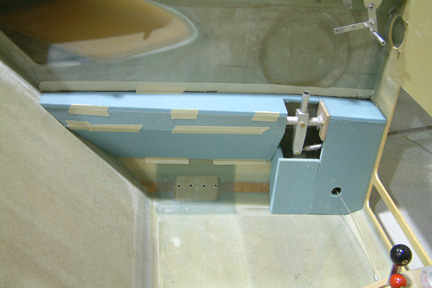
Here's
what I did to replace the urethane foam. 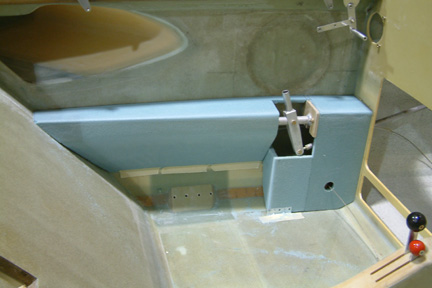 After
I 5-min. epoxied all the pieces together, I rounded off all the sharp edges before
glassing. I decided to make my armrest removable as many Cozy builders have done.
The difficult part was how to secure it. I prefer not to have too many anchoring
screws showing. However, hidden screws are difficult to get to...
After
I 5-min. epoxied all the pieces together, I rounded off all the sharp edges before
glassing. I decided to make my armrest removable as many Cozy builders have done.
The difficult part was how to secure it. I prefer not to have too many anchoring
screws showing. However, hidden screws are difficult to get to...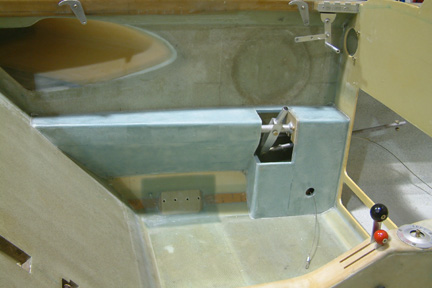 For
a removable armrest, I must first put packing tape at all contact locations for
release. Then I glassed the armrest in place so that it would fit the fuselage
profile well. With the packing tape release, it was not difficult to pop the
armrest off after the glass cured.
For
a removable armrest, I must first put packing tape at all contact locations for
release. Then I glassed the armrest in place so that it would fit the fuselage
profile well. With the packing tape release, it was not difficult to pop the
armrest off after the glass cured.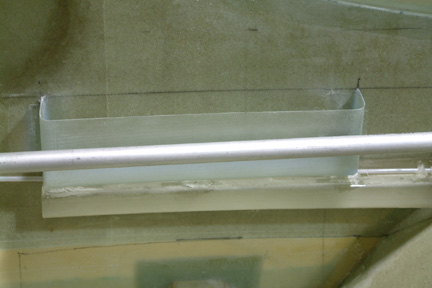 I
decided to use the map pocket to support some of the load for the armrest. So I
glassed the map pocket in place. I added 4 more strips of
BID along its sides to beef it up.
I
decided to use the map pocket to support some of the load for the armrest. So I
glassed the map pocket in place. I added 4 more strips of
BID along its sides to beef it up.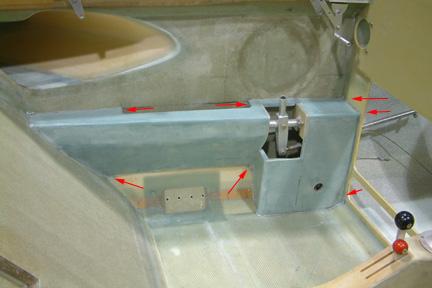 Here's
a picture of the armrest bolted in place. The red arrows indicate the screw
locations - a total of 7. I carved out about 1/2" x 1/2" holes in the
foam and then I filled them with flox. Once cured, I drilled and tapped into the
flox for
the attachment screws. They worked well and the armrests are bolted in place firmly.
Actually, I think I have too many screws because my armrests fit snuggly in
place without any attachment screws to begin with.
Here's
a picture of the armrest bolted in place. The red arrows indicate the screw
locations - a total of 7. I carved out about 1/2" x 1/2" holes in the
foam and then I filled them with flox. Once cured, I drilled and tapped into the
flox for
the attachment screws. They worked well and the armrests are bolted in place firmly.
Actually, I think I have too many screws because my armrests fit snuggly in
place without any attachment screws to begin with.