If you search through the Cozy archives on interior paint, you'll find lots of discussions and opinions on this subject. Generally, there are 2 camps:
1) The rattle can approach; and
2) Zolatone paint approach.
Personally, I like the rattle can approach because it is easy and inexpensive. Just buy the rattle cans from Lowes or Home Depot, shake them up, paint and you're done. No investment on the spray gun, no fiddling with the spray nozzle and cleaning of tools afterwards. I actually used this approach in Chapter 13 - Section 11. I bought the primer, the texture paint and UV clear coat. It worked out quite well. However, there are a couple of 'got-ya's' when I got to this section - a few years later. I cannot find the matching texture paint anymore, the company I got it from discontinued the product.
The second issue I have with the rattle can approach is that the finished surface is kind of rough to the touch - in the order of 80 grit sand paper. I was not too concerned then (Chapter 13) because the area I painted was under the nose cover - some builders didn't even bother to paint there! However, for the interior of the cockpit, I would like it to be smooth such that in the event of spills, they can be cleaned up easily. Besides, I do not like the scratchy interior surface either. So I decided to go with the Zolatone approach. Surprisingly, I ran into difficulty in getting the Zolatone primer. I decided to post the question to the group. After a few days of e-mail exchanges and phone calls, I concluded the following:
I called Zolatone (Automotive Product Division, MI (800 810 2785) directly and found out their recommended Zolatone Epoxy Primer (9271) & Catalyst (9271-000C) have been discontinued. No wonder I had such a hard time locating them (including AS&S)! The replacement primer is ZT-PExxx-G (xxx is the color of choice) and ZT-PA901 is the catalyst. They were a bit reluctant to sell me the small quantity directly. Instead, they recommended PBE Warehouse, one of their main distributors – to save on shipping cost (more on that later). The minimum quantity for the ZT-PE primer is 1 gallon (I was told we only need 1 Qt for our interior). Zolatone suggested that an alternative primer + catalyst will work with their 20 Series paint as well.
Here’s the list of suppliers that carry Zolatone paint, but may have to order the primer and catalyst when you place your order.
1) PBE Warehouse (recommended distributor) - PBE has several warehouses around the US. For me, it is right here in Downy, CA . Tel: (562) 803 4691. They stock all the Zolatone paints, however not the ZT-PE primer & catalyst here in California. I found out later that just about all the local Auto Paint stores order the paint from PBE. None can get the primer either. It was suggested that it may be a California environmental thing. So I have to look for alternative primer & catalyst instead;
2) Hawley’s, Santa Rosa, CA. http://www.hawleyspaint.com. Have the paint in stock, but cannot find the ZT-PE primer to order. Recommended alternate Zolatone Z91 Zo Ferro Basecoat Primer/Sealer for 2nd day pickup;
3) Auto Body Tool Mart, Elgin, IL http://www.autobodytoolmart.com. Popular internet source with paint and primer;
4) Tcpglobal, San Diego, CA (858) 909 2110 http://www.tcpglobal.com. Popular internet source for paint and primer;
5) I have tried several local (Los Angeles) Auto Paint Stores, they all can order the paint but not the ZT-PE primers (as discussed above).
I also received suggestions on proven replacement primers. One suggestion was Southern Polyurethanes Epoxy Primer http://www.southernpolyurethanes.com. It’s a 2-part epoxy primer for fiberglass as well. It comes in quart and gallon sizes with competitive prices and colors (white, gray & black). This primer has been used by a Cozy builder/flyer for both interior and exterior successfully. I ordered 2 quarts of primer and catalyst from Young’s House of Klear http://www.houseofklear.com (818-504-4933). The sales person happened to be delivering a large order to a local auto paint shop and brought my order with him at no extra cost. How convenient!
I got a loaner spray gun (one with a paint container and
a couple of hoses going to the spray gun) to start on my interior painter.
Everyone told me to try the spray gun out by playing with its controls until you
are satisfied with the paint sample. I read the manufacturer's spraying
instructions to prepare for the big day. Of course, their instructions are
totally different than the instructions that came with the paint can![]() .
I tried it anyway and charged forward. I ended up with 'orange peel', runs and
uneven build ups on all my parts...I was not happy! To make it more painful, it
took me 6 hours to remove every part of the gun to clean - it was a loaner,
remember?
.
I tried it anyway and charged forward. I ended up with 'orange peel', runs and
uneven build ups on all my parts...I was not happy! To make it more painful, it
took me 6 hours to remove every part of the gun to clean - it was a loaner,
remember?
I decided to stop and get better informed before proceeding forward. I found a good article (on the net) that taught me exactly how to set up the spray gun. It's a UK site (http://www.mig-welding.co.uk/spray-technique.htm). Their instructions are logical and lay out each adjustment step. I also paid closer attention to the spray gun adjustment article from Southern Polyurethane Inc. (Remember I am using their Primer and Clear Coat?) After following their adjustment approach, my old problems went away!
From the recommendations above, I ended up buying a new set of spray guns from Harbor Freight #94572. It comes with a 4 oz spray gun with 1.0mm nozzle and a 20 oz spray gun with 1.4mm and 1.8mm nozzles. It turned out that the 4 oz sprayer works perfectly for the primer and the larger gun (1.8mm) for Zolatone! The guns are much easier to clean as well. The gun set cost me ~$50.
Interior finishing is a bit different than the external. Most builders just do minor sanding to remove obvious bumps caused by tape joints, rough exposed surfaces, etc. Then they prime and paint with texture paint. The texture paint was there to 'hide' the glass weaves, thus minimizing all the sanding work inside the cramped quarters.
I used the rattle can (Fleckstone) approach when I painted under the nose cover in Chapter 13 - Section 11. Though it looks really nice, it has a rough surface - similar to the feel of 80 grit sandpaper. I was not too concerned with it because it is under the nose. However, I prefer to have a smoother surface in the sitting area. Its not scratchy and it will be easier to clean in case of spills and such. An alternative, as suggested by many Cozy builders before me, is Zolatone. It comes in many texture colors but it requires a bit more effort. I decided to add micro and smooth out the interior surfaces ( to a reasonable extent), apply primer, Zolatone paint and clear coat.
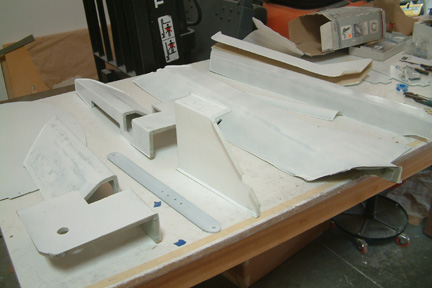
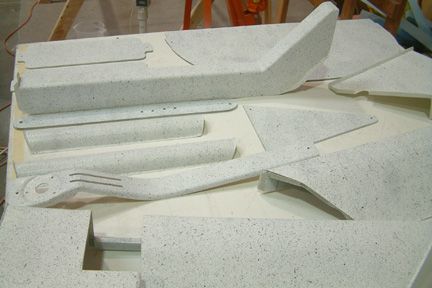
The first task was to fill and sand. I can't believe the number of loose parts I have built inside the fuselage - just for creature comfort. They include the seats (4), the arm rests (4), seat backs (2), strake covers (3), fuel line covers (2), center console (front), center console (back), air brake actuator cover (1), and back seat supports (2).
|
|
|
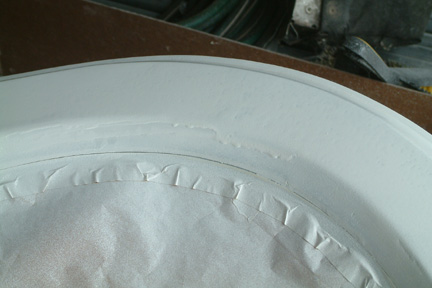
I prep sanded the interior the best I could without cutting into the glass weaves. The next step was to apply micro onto the big bumps and tape joints. I also made slurry micro and squeegeed it onto the general surfaces. I tried it on the arm rest earlier and it worked out well. Since my main 'fill' objective here is to hide the weaves before prime and paint, the slurry micro will 'level' out the weaves. After cure, I broke the glossy micro surface with 80 grit then smoothed it out with 220 grit. The surface is smooth to touch and it is ready for the primer. I hope this prep sand will give me a smooth surface after paint. |
|
|
|
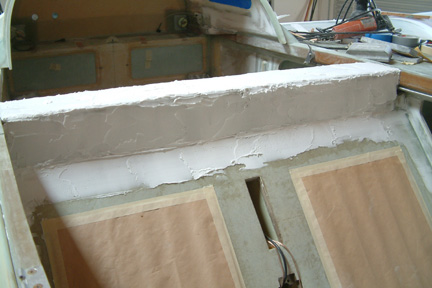
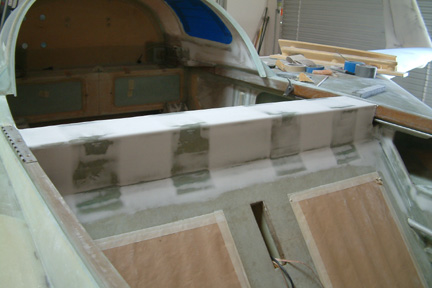
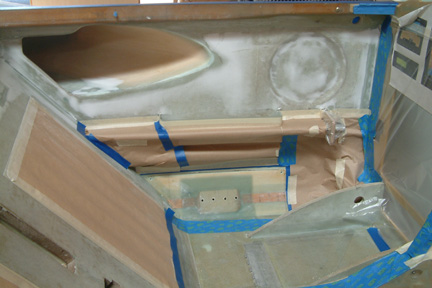
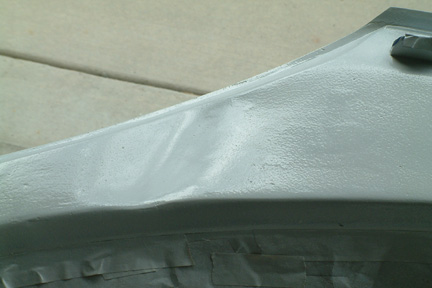
Here's the before and after picture of the shoulder area. I put a lot of micro onto this area because of the added plies for the shoulder harness support. It was still not enough in some areas and I will have to use slurry micro to touch up those areas - especially the forward top edge. |
|
|
|
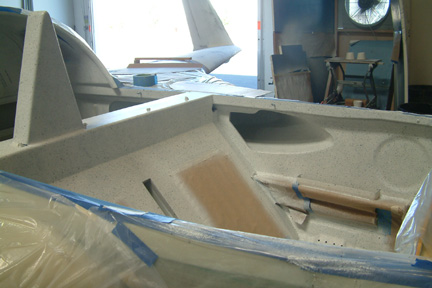
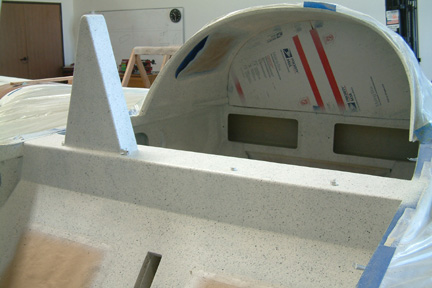
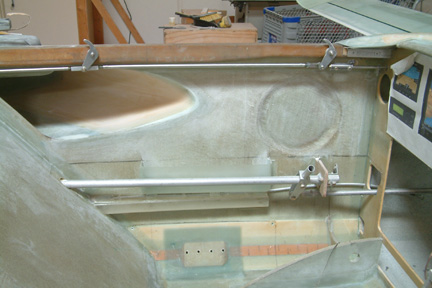
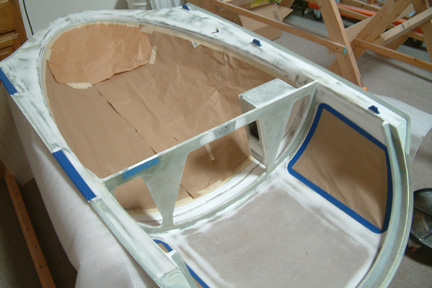
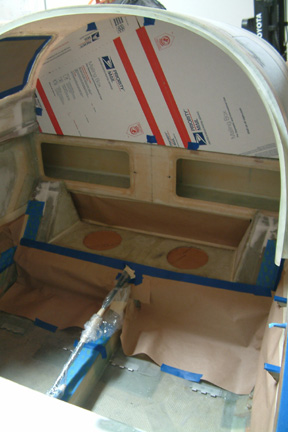
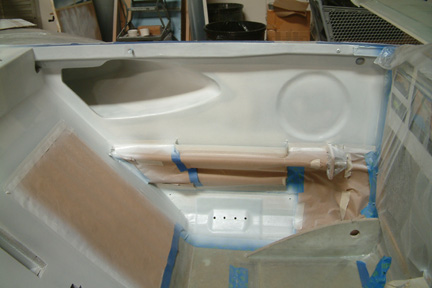
Since I will be spraying on my interior primer, everything else needs to be masked off. I cannot believe the amount of masking required. The covers for the windows must be trimmed to fit; all the control rods need to be removed and marked; those little metal brackets must be wrapped, those bolt holes must be plugged and on...and on... Notice the complimentary cover from US Postal Service for my battery compartment?
Be prepared for a lot of work. But then,
you'll find out soon enough, just wait till it is your turn
|
|
|
|
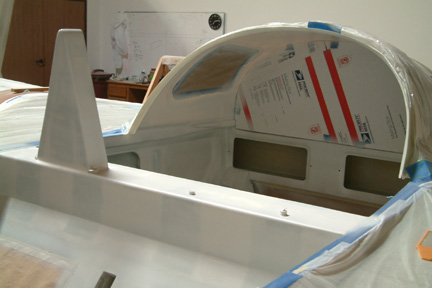
Some more masking before primer - both front and back. I bought a roll of brown paper from Lowe's for masking - a real time saver. |
|
|
|
Once I completed masking (so I thought), I was ready to prime the interior and removable parts (arm rests, seats, battery compartment cover, etc.). Keith Spreuer loaned me his spray gun for use. Since I have little experience with spray paint techniques, I did not set the sprayer correctly. I ended up with orange peels (left) and oversprays / runs (right). |
|
|
|
Discouraged, I decided to sand off the problem areas and re-prime. Before that, I went through the Internet to get educated in setting the spray gun correctly. I ended up buying a new set of gravity feed spray guns for this particular purpose. They were from Harbor Freight - though cheap, but if set up correctly, they worked well. My second trial was much better. I turned down the spray pressure as well as the fluid control, resulting in a lighter mist spray. By using multiple passes, I was able to do a much better job in controlling the primer layer. |
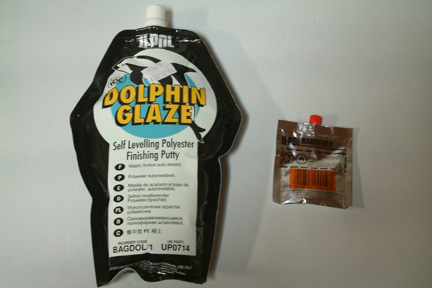 |
After the primer cures - it took about 20 minutes. I inspected the entire primed surfaces for extra 'bumpy/ugly' areas. This will be the last chance to patch it up. Tim Andres recommended Dolphin Glaze. Its a 2 part filler, kinda like bondo, except it flows real well and its self leveling into cracks and dents. It cures in 10 minutes and can be sanded very easily. I have a few small low spots. Once sanded down, no more re-prime is required. Just spray the Zolatone over it. | |
 |
 |
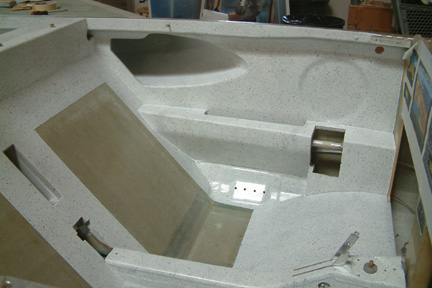
Here's a picture after Zolatone
is applied. I used their Series 20-63 Marble Stone color pattern. It
gave me a clean look yet covering up a LOT of the fiber glass weave
patterns and sanding marks. Though I spent a lot of time sanding and
preparing the interior for paint, I am glad I used the texture paint
after all.
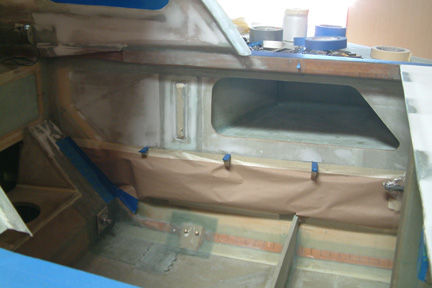
The most difficult part in the interior painting is the elbow storage areas. My gravity feed spray has a paint reservoir on the top and it gets in the way of getting a nice and even paint placement. I have to struggle with it quite a bit like adjusting the spray pressure, fluid control and spray directions etc. That's probably my least attractive spot. Fortunately, it's hidden from view. I used a total of 1/2 gallon of Zolatone for interior paint. |
 |
 |
Picture (left) shows interior
parts after primed. Picture (right) shows parts painted with Zolatone. There are a lot of parts! I applied clear coat on the interior parts before applying it to the interior.
|
I preferred the bare Zolatone look, however, I was advised by many that the clear coat is there to protect the surface in case of spills, etc. One of the recommendations for clear coat is Transtar # 6864 Clear Coat. However, it was discontinued and I can only get it by the gallon. Since it needs an activator with 4:1 ratio, I will have 1 gallon and 1 Qt - a bit much for my needs. Since any automotive clear coat should be OK, I decided to look for an alternative. I turned to Southern Polyurethane (SPI) again, since I had good luck with their primer. After some web search, their Universal Clear Coat received very good reviews by the automotive paint professionals. I decided to get a quart + activator. Since their mixing ratio is 1:1, I'll end up with 2 quarts clear coat.
I called up their local distributor and inquired about their pricing - $35/qt each (clear coat and activator). It's still cheaper than a gallon of Transtar Clear Coat for $100 + activator. I placed the order at 10:00am and was delivered by 2:00pm same day with no shipping charge. Can't ask for better service than that.
|
My difficulty with the clear coat is that I had a hard time seeing how much clear coat was being sprayed onto the surface. I think it was the lighting of my temporary spray booth. I ended up putting too much on some spots and not enough on others. So I had to go back and do some touch up AND clean my spray gun again!
In the picture, you can see the reflective nature of the high gloss clear coat. Unfortunately, it also highlights the flaws the Zolatone was trying to hide. I would think about using a flat or matte clear coat if I do it again - that's just my personal choice. |

 The
SPI Universal Clear Coat is some sticky stuff. Once it is mixed with the
activator, it's as runny as water and sprays easy. So you can pretty much set
your spray gun with water before using the real thing.
The
SPI Universal Clear Coat is some sticky stuff. Once it is mixed with the
activator, it's as runny as water and sprays easy. So you can pretty much set
your spray gun with water before using the real thing.